
Setting up a GoHighLevel restaurant snapshot might feel overwhelming at first—but once you know the steps, it becomes one of the fastest ways to launch a full-service system for any restaurant client.
Whether you’re an agency owner, freelancer, or even a restaurant operator trying to streamline operations, this guide walks you through every critical step—from importing the snapshot to launching automations and connecting communication channels.
By the end of this article, you’ll have a fully-functioning restaurant marketing and automation system—customized, connected, and conversion-ready.
✅ Snapshot Setup Checklist Highlights
- Learn how to import and customize your restaurant snapshot in minutes
- Step-by-step setup for AI chatbot, CRM, booking forms, and automations
- Customize menus, offers, and campaigns specific to the restaurant
- Integrate SMS, email, social messaging, and Google Business
- Launch with confidence—even if it’s your first time using GoHighLevel
Snapshot Setup Overview
The Restaurant Snapshot for GoHighLevel is a prebuilt system designed for food businesses. It includes workflows, landing pages, SMS/email automations, AI chat, a full website, loyalty campaigns, review generators, and much more.
Why use a snapshot?
- Speeds up onboarding new clients
- Gives you a plug-and-play system instead of building from scratch
- Includes pre-configured campaigns for reservations, upsells, and reviews
- Easy to brand and scale across multiple clients
Let’s break down the complete setup process into manageable steps.
Step 1 Import the Snapshot
Start by importing the restaurant snapshot into your GoHighLevel agency dashboard.
How to import:
- Go to your Agency View in GHL
- Click on Snapshots → Import Snapshot
- Upload your snapshot .json file
- Rename it to match your client or brand (e.g., “Bella Pizza Snapshot”)
💡 Pro Tip: Always keep a clean master version, then clone and modify per client.
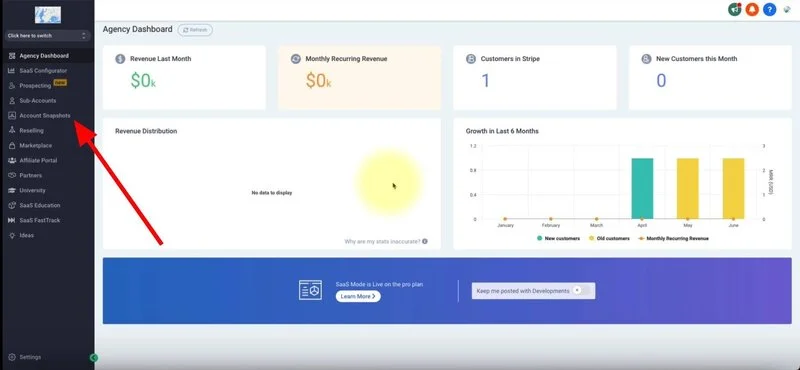
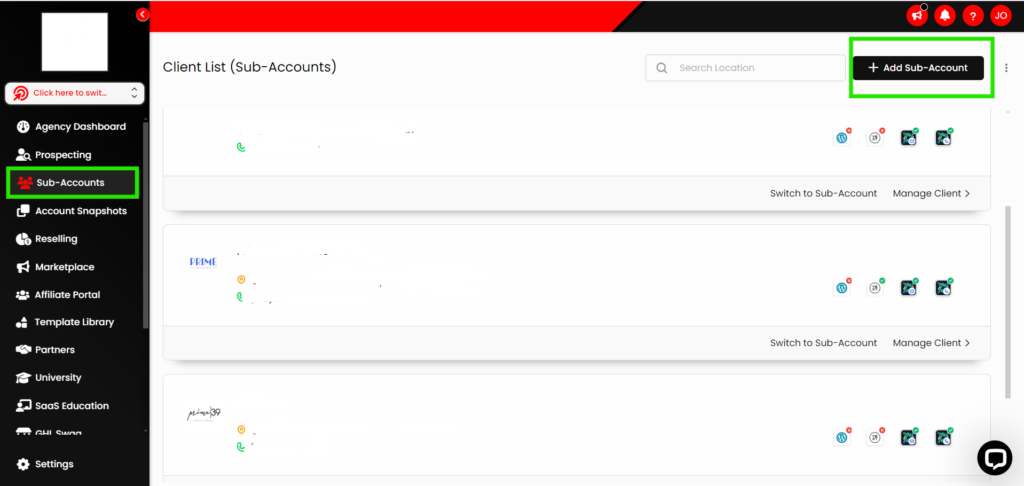
Step 2 Create or Link a Sub-Account
Once imported, assign the snapshot to a new or existing location.
Create a new sub-account:
- Go to Accounts → Create New Account
- Fill in business name, email, website
- Select your restaurant snapshot during creation
Or apply it to an existing account via Settings → Account Snapshot → Load Snapshot
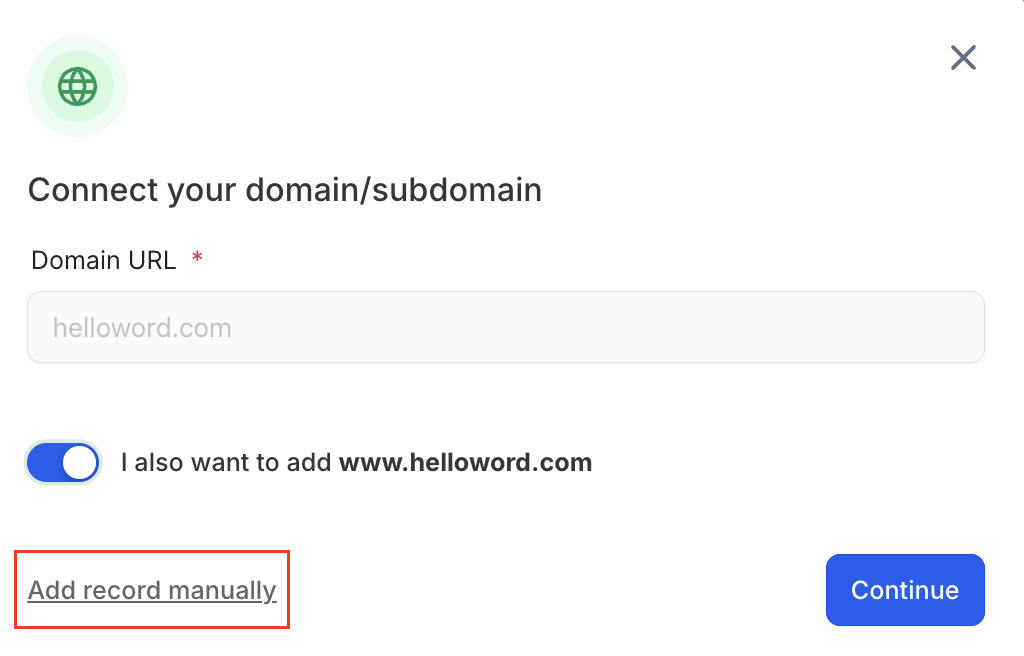
Step 3 Connect Your Domains and DNS
A professional restaurant brand starts with a custom domain.
What to do:
- Go to Settings → Domains
- Add your domain (e.g., order.bellapizza.com)
- Update DNS records in your domain registrar (GoDaddy, Namecheap, etc.)
Need help? GHL provides DNS records and connection verification tools.
📌 Tip: Use subdomains for booking portals or online menus.
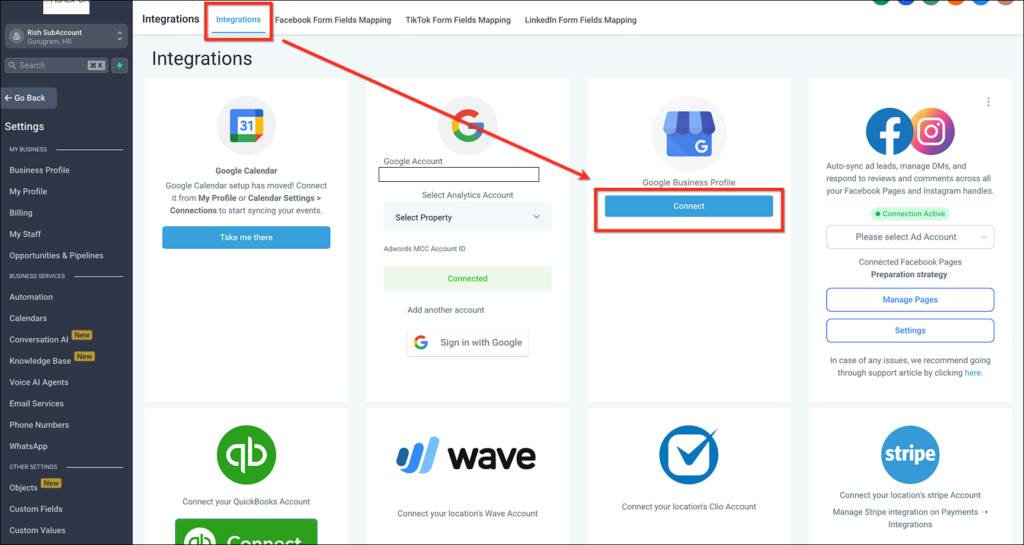
Step 4 Set Up Communication Channels
You’ll want to connect all the customer communication platforms:
Channels to connect:
- Phone system (LC Phone or Twilio)
- Email (SMTP or Mailgun)
- SMS (through LC Phone or Twilio)
- Facebook + Instagram (for DM automation)
- Google Business Profile (to send/receive messages)
- WhatsApp (optional, for international use)
Go to Settings → Integrations to connect each one.
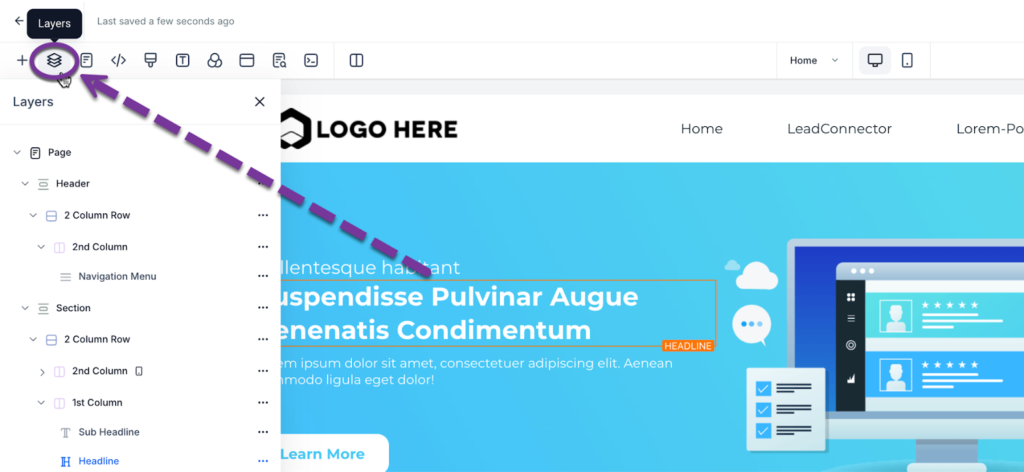
Step 5 Customize Website & Menus
The restaurant website included in the snapshot is prebuilt, but you’ll want to personalize it.
Customize:
- Logo, brand colors, and fonts
- Home, About, Menu, and Contact pages
- Replace placeholder text and images
- Update menu items with current pricing and descriptions
- Connect delivery links (e.g., Uber Eats, DoorDash)
- Embed reservation forms or connect to calendars
Launch via Sites → Websites
🛠 Pro Tip: Enable tracking pixels like Meta Pixel or Google Analytics.
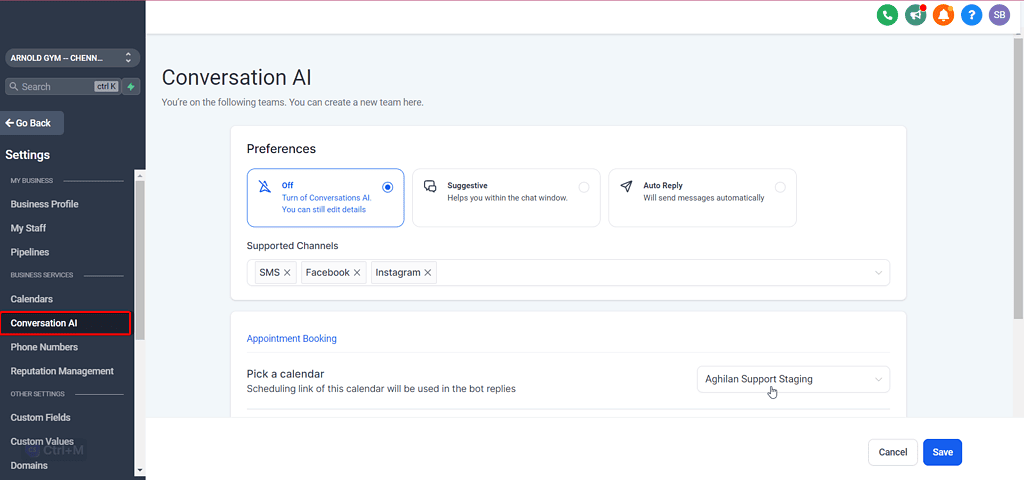
Step 6 Train the AI Assistant
This is where the magic happens.
Train the chatbot:
- Go to Settings → Conversation AI → Bot Training
- Add common Q&A pairs
- “Do you have vegan options?”
- “What are your hours on Sunday?”
- “Where are you located?”
- Enable Auto-Pilot for hands-free operation
- Select Channels where the bot should be active (SMS, Messenger, Web Chat, etc.)
- Use the Bot Trial tab to test responses and adjust as needed.
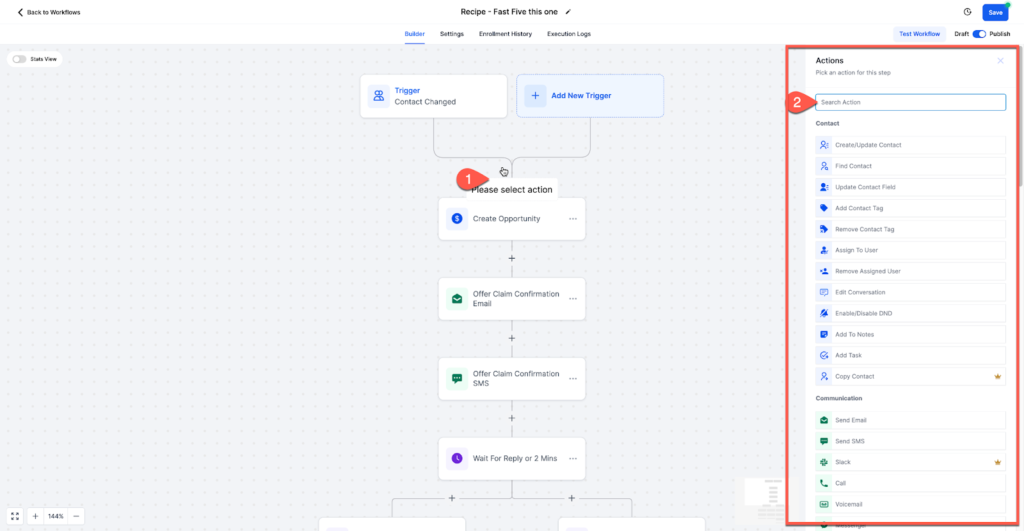
Step 7 Configure Workflows & Automations
The snapshot includes prebuilt workflows like:
- Reservation confirmations
- Missed call SMS
- Review requests
- Birthday offers
- Loyalty and reactivation flows
To activate workflows:
- Go to Automation → Workflows
- Open each relevant workflow
- Update:
- Business name
- Links
- Contact details
Turn on each workflow
📍 Checklist Tip: Double-check SMS/email sender profiles before going live.
Step 8 Launch Review and Loyalty Systems
Review System:
- Located in Automations → Review Request Workflow
- Sends review requests after dine-in or delivery
- Add Google, Yelp, or Facebook review links
Loyalty Campaigns:
- Included in the snapshot as prebuilt workflows
- Offer birthday specials, VIP coupons, or family meal upgrades
- Schedule follow-ups through SMS or email sequences
💬 Engagement Tip: Use emojis and friendly language in loyalty messages for better conversion.
Step 9 Test the Full Experience
Before going live, walk through the entire user journey:
- Submit a reservation on the website
- Message the business on Facebook and test bot replies
- Place a call and trigger the missed call text
- Complete a mock order and ensure review requests go out
- Check CRM to confirm contacts are added and tagged correctly
Frequently Asked Questions
Do I need coding skills to use the snapshot?
Can I use this same snapshot for multiple restaurants?
How long does setup usually take?
What’s the difference between training and testing the AI bot?
What if I don’t have a domain yet?
Conclusion
Setting up the Restaurant Snapshot in GoHighLevel isn’t just about plugging in a few templates—it’s about giving restaurant clients a powerful, automated marketing engine.
From bookings to reviews to loyalty, everything is prebuilt, customizable, and scalable. And once you’ve set it up once, you can roll it out to every new client in a fraction of the time.
If you’re ready to turn one-time clients into monthly revenue—and help restaurants thrive while you scale—this setup checklist is your go-to guide.